How to Get the Glass Hair Look: Celebrity Stylist Chris Appleton's Complete Tutorial
Skip to:
If you've ever scrolled past a photo of Kim Kardashian, Jennifer Lopez, or Ariana Grande with hair so sleek and shiny it looks like liquid — that's glass hair.

The good news: you don't need a Hollywood glam squad to pull it off. You need the right products, the right technique, and about 20 minutes. Here's Chris's exact routine, broken down step by step.
What Is Glass Hair?

There's zero frizz, zero flyaway, and zero dullness. Every strand lies flat and catches light evenly.
It's most often worn straight, but the real defining feature isn't the shape — it's the shine level.
Regular straight hair isn't glass hair. Glass hair has a depth of gloss that looks almost digitally enhanced, even in real life.
Getting there requires addressing two things most styling routines skip entirely:
Why Is Glass Hair So Hard to Achieve?
Most styling routines are working against themselves before they even start. Here's why:
The majority of shampoos, conditioners, and styling products contain ingredients engineered to stick to your hair — silicones, conditioning resins, and thickening agents. These coat the cuticle unevenly, scattering light instead of reflecting it.
Even perfectly smooth hair can puff and frizz when moisture from the air penetrates the hair shaft. No amount of brushing or flat-ironing will hold if you haven't humidity-proofed your strands.
Heat alone won't create glass hair. It's the combination of tension, heat, and the right product activation that seals the cuticle flat.
What You'll Need

What You'll Need
How to Get Glass Hair: Step-by-Step Tutorial
Step 1: Start with Residue-Free Hair
This is the step most people underestimate — and it's arguably the most important.
Here's the problem: almost every shampoo on the market is formulated to do more than clean. It promises to moisturize, de-frizz, thicken, or add shine.
But to deliver on those promises, it needs ingredients that stick to your hair — which means you're never actually starting with a clean slate.
Silicones, pearlizing agents, thickening resins, conditioning polymers all create a film on the cuticle that diffuses light unevenly, resulting in dull, flat-looking hair no matter how much you style it.
 The fix: Color Wow Color Security Shampoo.
No ingredients designed to stick, coat, or build up. Just an immaculately clean surface — which is exactly the foundation glass hair needs.
Step 2: Condition Without Weighing Hair Down

Clean hair still needs hydration — but the type of conditioner matters enormously for the glass hair look.
Traditional conditioners are loaded with ingredients that can oxidize over time, leaving hair looking dull or brassy. They can also coat the cuticle too heavily, which scatters light instead of reflecting it.
Chris reaches for Color Wow Color Security Conditioner because it detangles and hydrates without those problematic agents.
Your hair gets the slip it needs for styling, without anything sitting on top of the cuticle disrupting that mirror-like finish.
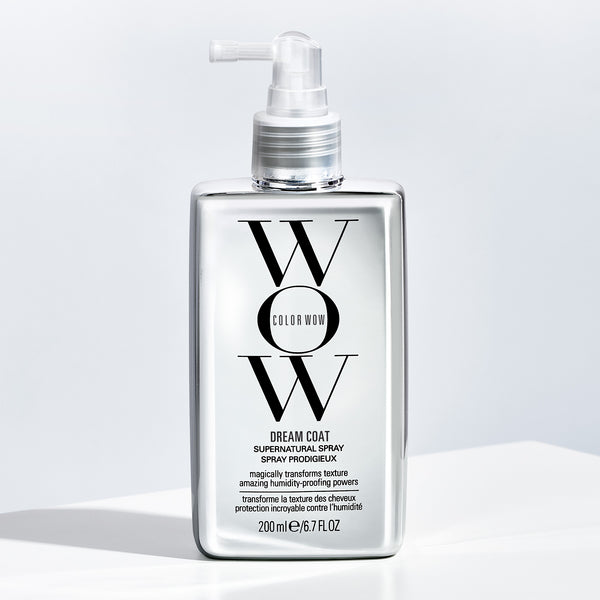
Step 3: Apply Dream Coat Supernatural Spray

This is Chris Appleton's most-reached-for product — and for good reason.
Dream Coat Supernatural Spray is not a traditional anti-frizz spray or shine serum. It uses hydrophobic technology to waterproof hair from the inside out, sealing the cuticle against environmental moisture.
The result? Frizz can't form because humidity can't get in.
How to apply it:
Step 4: Blow Dry with Tension
This is where the glass hair finish actually happens — and technique is everything.
Think of it like ironing a shirt: heat alone won't remove wrinkles, but heat with tension will.

Chris's technique:
Pro Tips for the Perfect Glass Hair Look
Heat-activated products (including Dream Coat) finish setting as the hair cools. Running your fingers through your hair right after blow-drying can disrupt the finish.
A good paddle brush with closely-spaced bristles gives you more surface contact and more tension — both of which improve your glass hair outcome.
If you have very curly or coily hair, you may need additional tension and time per section. The results are equally stunning.
Wrap your hair in a silk or satin scarf before sleeping. Cotton pillowcases create friction that breaks down the sleek finish overnight.
How Long Does Glass Hair Last?

Thanks to Dream Coat's waterproofing technology, the glass hair effect doesn't disappear the moment you step outside.
Many people find the finish actually looks even better on day two, once the style has fully settled.
Frequently Asked Questions

Can I get glass hair without a blow dryer?
The blow-drying step is essential for activating Dream Coat. The heat and tension are what seal the cuticle flat and lock in the waterproofing effect. Air-drying won't give you the same result.
Does glass hair work on curly hair?
Yes. Glass hair refers to the shine and smoothness level, not a specific hair texture.
If you have curly or wavy hair and are straightening it for the glass hair look, use the same routine — you may just want to take smaller sections during blow-drying for better control.
How is glass hair different from regular straight hair?
Regular straight hair can still look dull, frizzy, or flat. Glass hair has a specific high-gloss, mirror-like quality that comes from having a perfectly smooth, residue-free cuticle that reflects light evenly.
Do I need to use heat tools after blow-drying?
Not necessarily. Chris's method uses the blow dryer with tension to achieve the glass effect.
Some people follow up with a flat iron for extra sleekness, but it's not required if your blow-dry technique is strong.
Can glass hair be done on color-treated hair?
Absolutely.
Color Security Shampoo and Conditioner are formulated to be color-safe, and Dream Coat is suitable for all hair types, including chemically treated hair.
Why is my hair not as shiny as I expected?
The most common culprits are residue left from a previous shampoo, not saturating Dream Coat thoroughly, or not maintaining enough tension during blow-drying.
Make sure you're starting from a completely clean base and applying Dream Coat section by section for even coverage.